Add withdrawal page
Create a dedicated Withdrawal page in your theme and add the Easy Withdraw form to it.
Last updated
The withdrawal form needs a home. A dedicated Withdrawal page gives your customers one stable link to open the form and declare a withdrawal. This guide creates that page and puts the Easy Withdraw form on it. The steps below cover Online Store 2.0 themes, the type most stores run. Vintage and headless storefronts differ, so skip ahead if one matches your store.
Which storefront do you have?
Most Shopify stores run an Online Store 2.0 theme, where the form installs as an app block. If you run a vintage (Liquid) theme, see Vintage (Liquid) themes. If you run a headless storefront, see Headless storefronts.
Create a withdrawal page template
First, build a page template to hold the form. You create it once in the theme editor, then reuse it for the Withdrawal page.
Open your theme
From your Shopify admin, go to Online Store → Themes. On your live theme, click Customize. The theme editor opens.
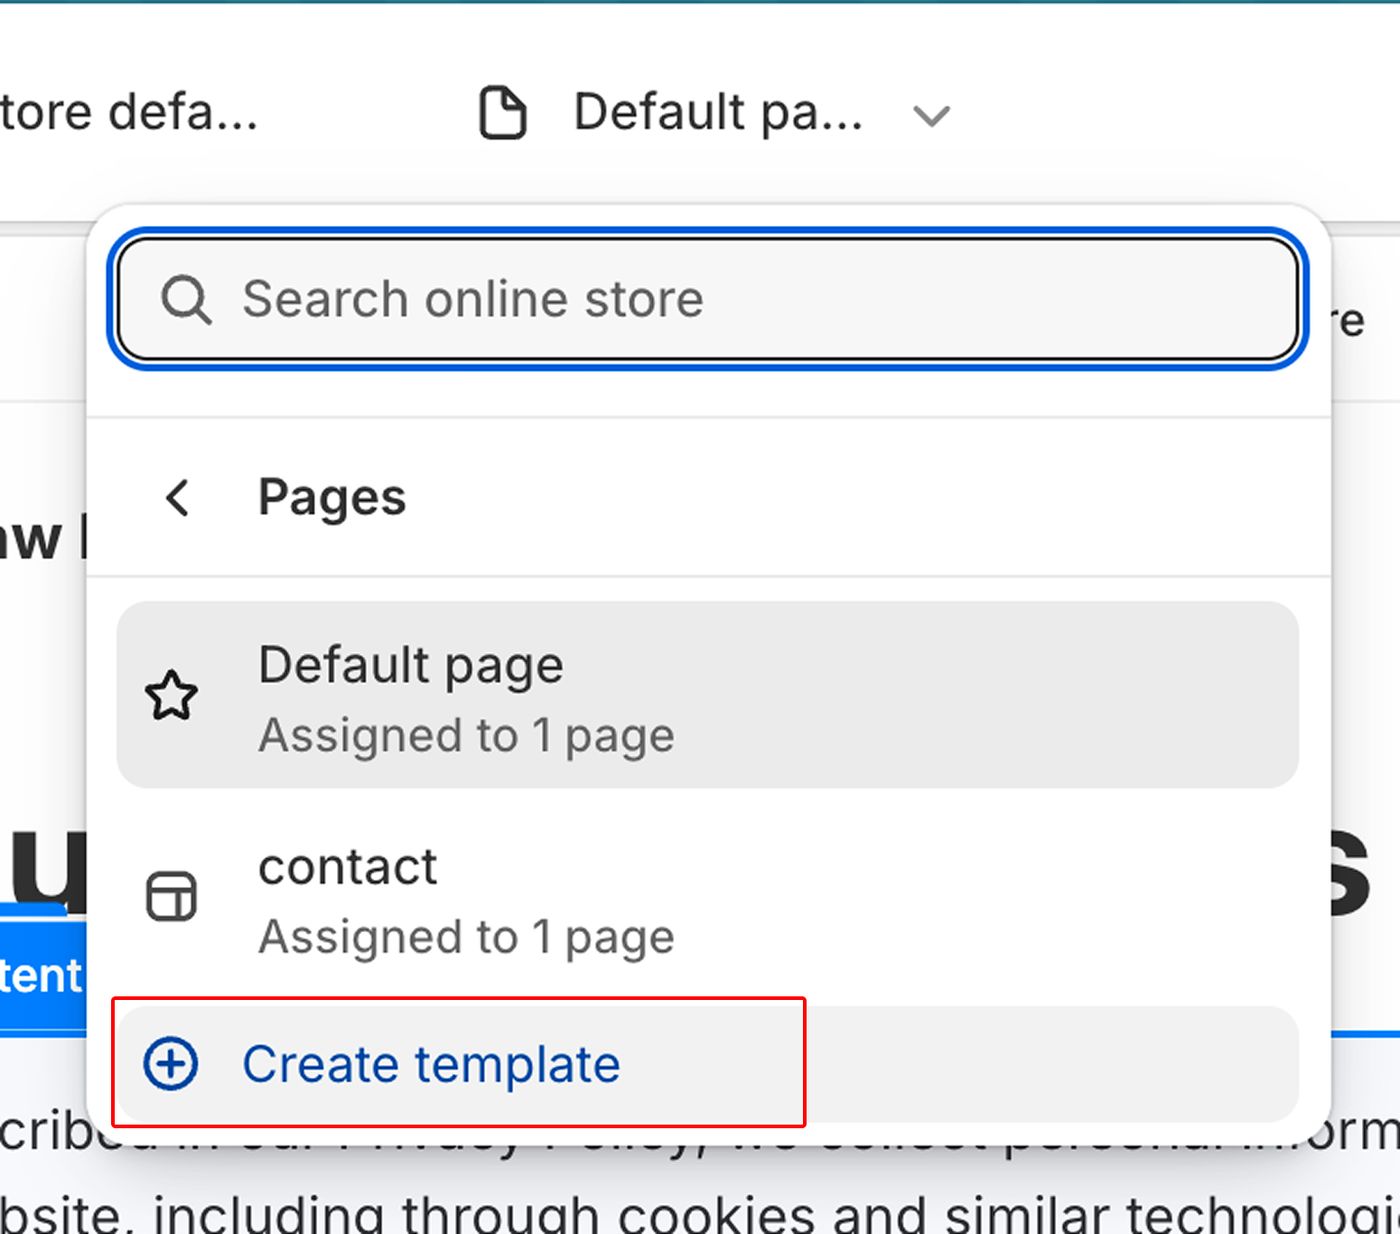
Open the template picker
In the top bar, click the template name (it reads Default page by default). A dropdown lists your templates.
Create a page template
Select Pages, then click Create template. The Create a template dialog opens.
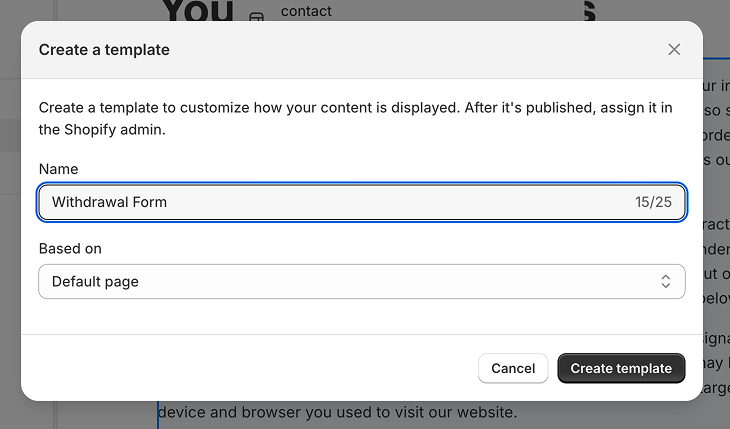
Name the template
In the Name field, enter
Withdrawal Form. In the Based on dropdown, select Default page. Click Create template. Shopify createstemplates/page.withdrawal-form.jsonand opens it for editing.
Add the Withdrawal Form to the template
With the template open, add the form as an app block.
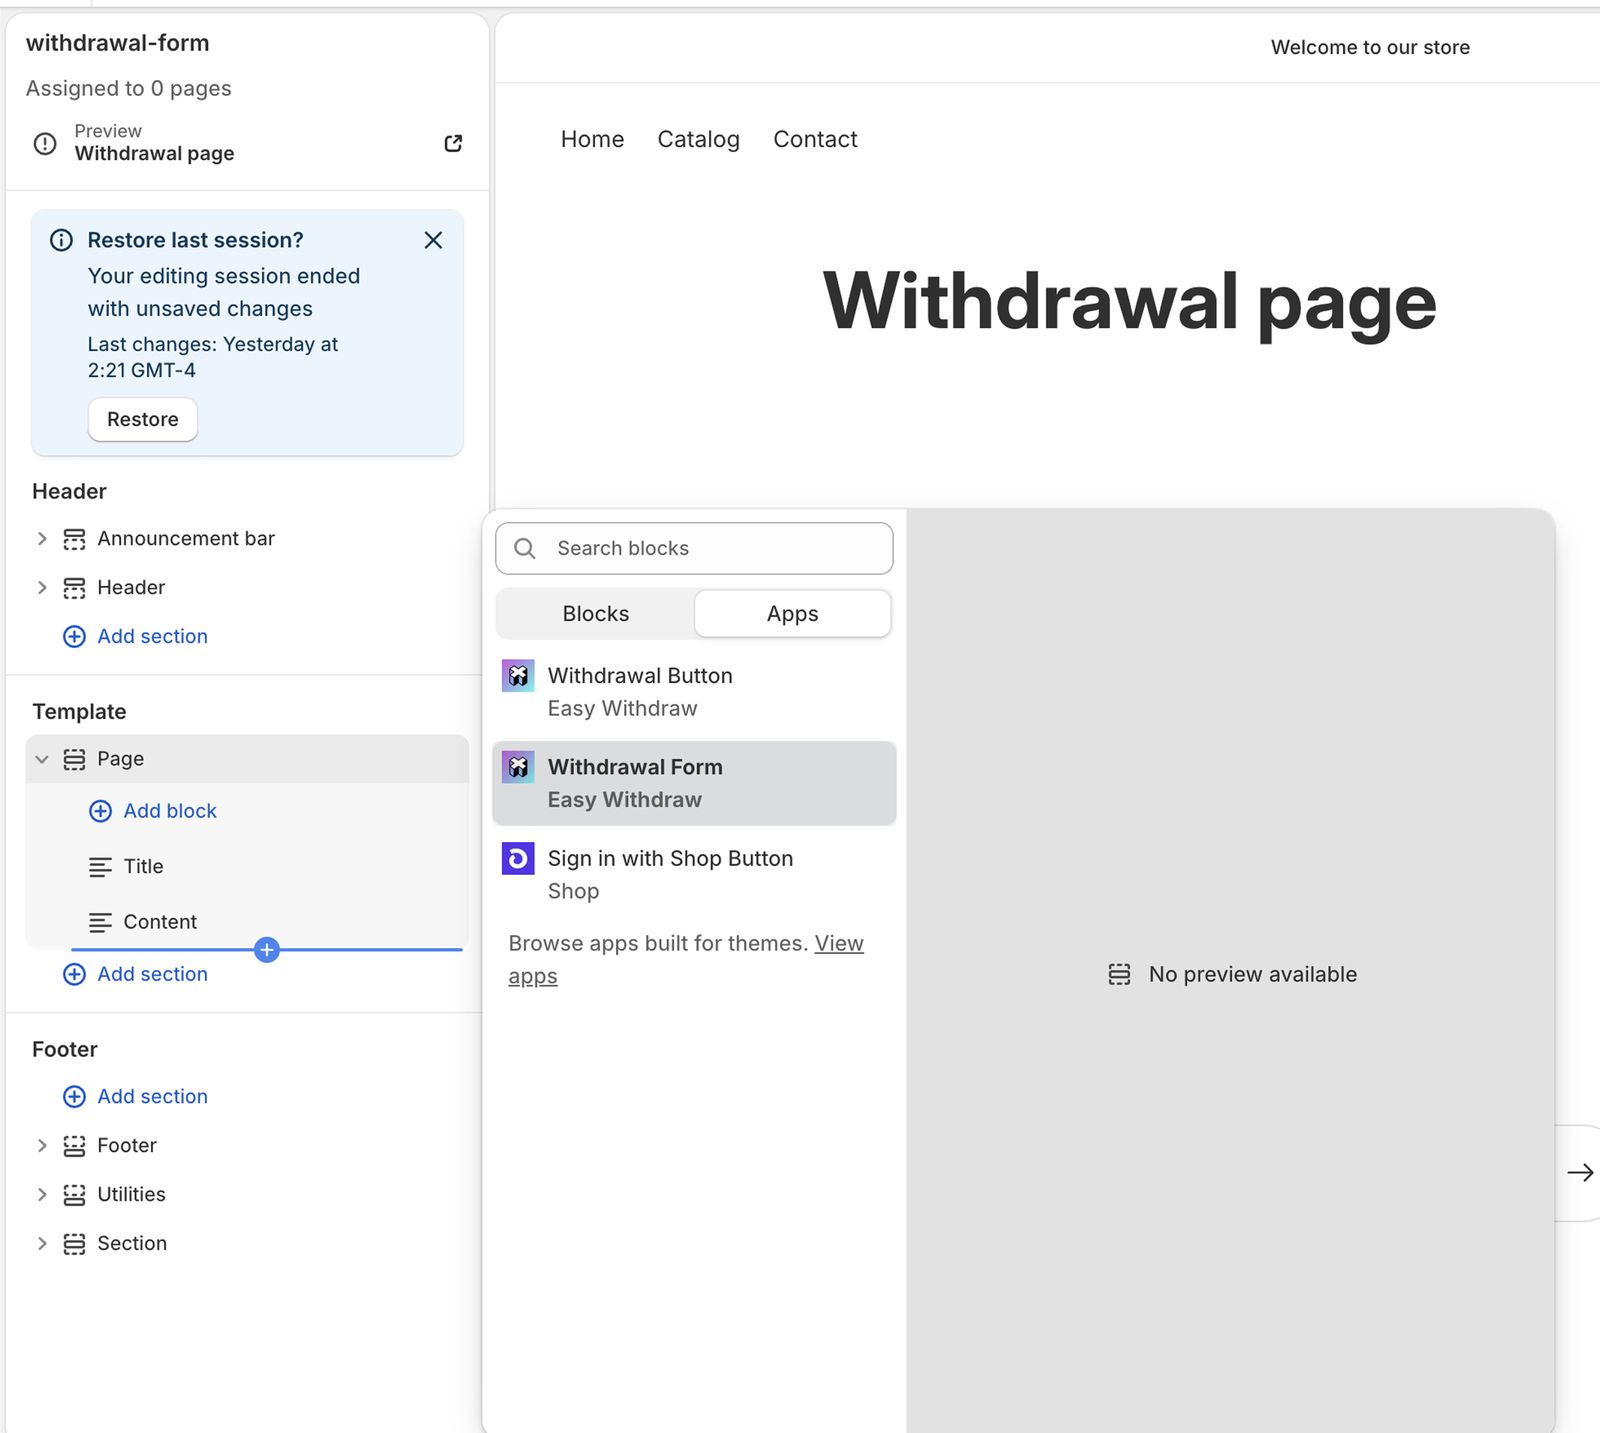
Open the section picker
In the theme editor sidebar, click Add section. The picker opens with an Apps tab.
Choose the form
Open the Apps tab and select Withdrawal Form (listed under Easy Withdraw). Do not pick Withdrawal Button, which adds the floating button instead. The form block appears in the template preview.
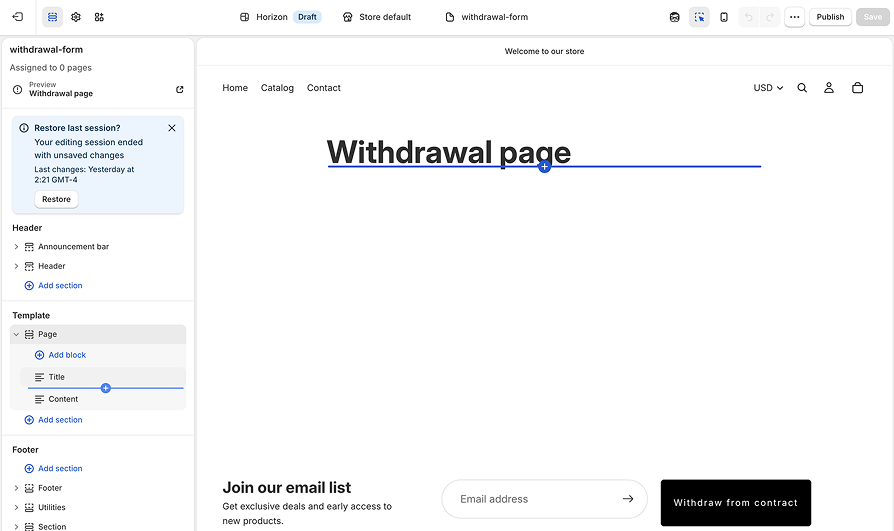
Save the template
Click Save. A confirmation appears in the top bar, and the form is now part of the template.
Form vs. button
Easy Withdraw offers two blocks. Withdrawal Form is the full on-page form used here. Withdrawal Button adds the floating button instead. You can use both: the button for quick access, the page for a permanent link.
Create the Withdrawal page
The template is ready. Now create the page that uses it.
Add a page
Go to Online Store → Pages, then click Add page. A blank page editor opens.
Name the page
In the Title field, enter
Withdrawal. Leave the Content area empty. The form template supplies everything customers see.Assign the template
In the Online store card on the right, open the Theme template dropdown and select withdrawal-form. The page now renders through your form template.
Tip: shops with multiple languages
If your shop sells in more than one language, translate the page title and handle with Shopify Translate & Adapt. Each language then shows the name customers expect, for example "Widerruf" in German or "Rétractation" in French.
Make the page visible
New pages can stay hidden while you finish setup. Publish the page when it is ready.
Set the page to visible
In the Visibility section, select Visible. To stage the page first, keep Hidden selected and switch it later.
Save the page
Click Save. The page is now live at
shop-name.myshopify.com/pages/withdrawal.
Verify
Confirm the page works before you link to it.
Open the page
On the saved page, click View page. The Withdrawal page opens in a new tab.
Check the form
Confirm the Easy Withdraw form renders in your store's language. Submit a test declaration and confirm it reaches your Withdrawals list in the app.
Link the page in your footer
Customers need to find the page. The clearest option is a button. You can also add it to the footer menu.
Recommended: add a footer button
Open the theme editor
Go to Online Store → Themes and click Customize. Scroll the preview to the footer.
Add a button block
Select the footer section, click Add block, and choose a Button. A new button appears in the footer. If your theme's footer has no button block, use the footer menu below.
Link the button
Set the button label to
Withdrawaland link it to your Withdrawal page. Click Save. The button now shows on every page footer.
Or: add it to the footer menu
Open your menus
Go to Online Store → Navigation, then click Footer menu. The menu's items appear.
Add a menu item
Click Add menu item, set the name to
Withdrawal, and link it to your Withdrawal page.Save the menu
Click Save menu. The link now appears in your storefront footer.
Vintage (Liquid) themes
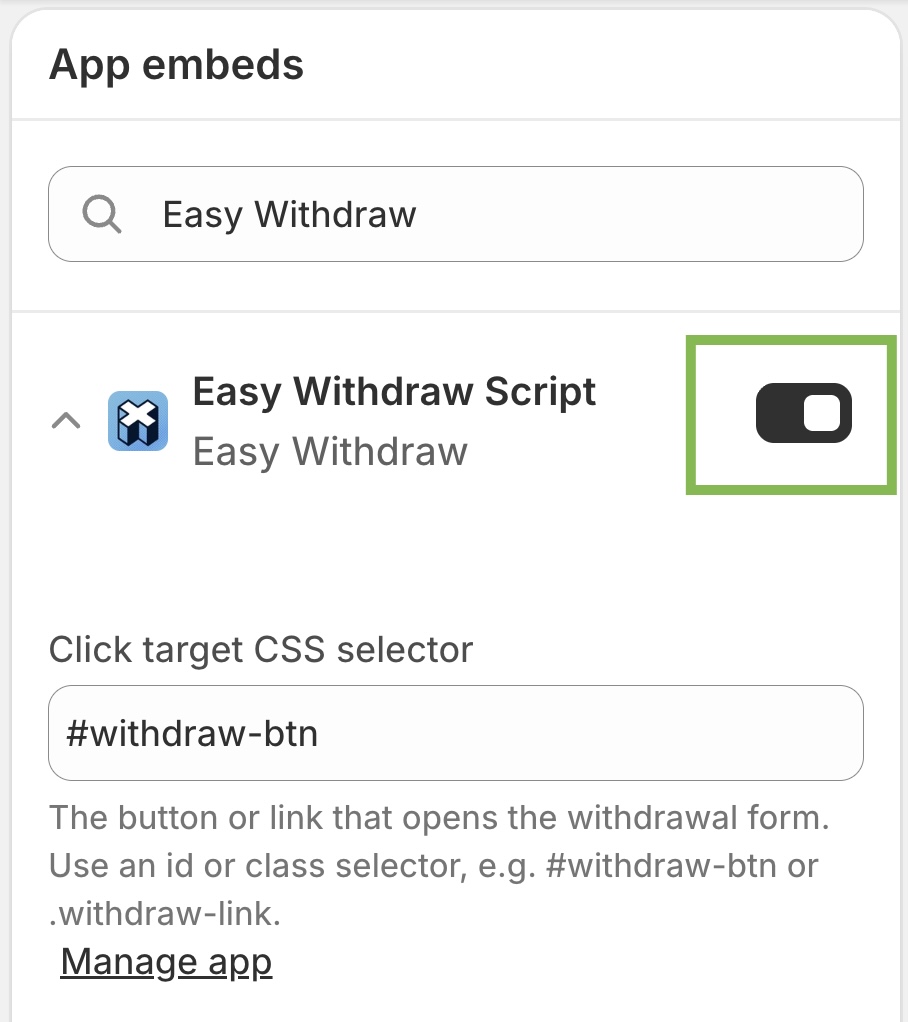
Vintage themes do not support app blocks, so the form arrives through the Easy Withdraw Script app embed instead: you switch the embed on once, then mark where the form should appear with a single placement line in a Liquid template. No API key and no script code to paste.
No app block picker
Vintage themes have no app block picker. Do not look for Withdrawal Form under Add section. Enable the app embed and follow the code editor steps below.
Enable the Easy Withdraw Script app embed
In the Easy Withdraw app, open Button and form → Add withdraw form and click Activate in theme editor. The theme editor opens its App embeds panel with Easy Withdraw Script already switched on; click Save. You can also enable it manually: in the theme editor, open Theme settings → App embeds, search for
Easy Withdraw, and turn the toggle on.Add a page template
Go to Online Store → Themes. On your theme, click the ... button (Actions), then Edit code. In the Templates folder, click Add a new template. Choose page, name it
withdrawal-form, and create it. Shopify addstemplates/page.withdrawal-form.liquid.Paste the form placement line
Copy the one-line placement snippet shown on the Add withdraw form screen (
<div data-easy-withdraw-form></div>), paste it into the new template where the form should appear, and click Save. The app embed finds this marker and renders the form there.Create and publish the page
Follow Create the Withdrawal page above, select the page.withdrawal-form template, make the page visible, and link it in your footer.
Headless storefronts
A headless storefront has no Shopify theme and no Pages section, so you add the withdrawal page in your own codebase. The app does the wiring for you: in Easy Withdraw, open Button and form → Add withdraw form, pick your storefront under Headless storefronts, and the on-screen guide hands you the snippet tailored to your store.
You do not need to copy any code from this article. The Add withdraw form screen offers:
- React / HTML examples. Switch the code sample between a React component and a plain HTML script tag, so it drops straight into your framework (Hydrogen, Next.js, Astro, plain HTML, and so on).
- Copy MD. Copies a ready-to-paste brief for your AI coding agent (Claude Code, Cursor, and the like). It walks the agent through mounting the form, loading the script once, and adjusting your Content-Security-Policy.
- Content-Security-Policy step. If your storefront sets a CSP, the guide lists the exact directives to add so the form's script and frame are allowed to load.
Authorize your storefront domains
The form is served from Easy Withdraw and embedded into your pages, so every domain it runs on has to be on your allowlist. On the same Add withdraw form screen, add each domain under Storefront domains: your live domain plus any staging, preview, or custom domains you use. A domain you forget here is blocked from showing the form.
Once the snippet is in place and your domains are authorized, deploy your storefront and link your withdrawal route (for example /withdrawal) from your footer so customers can always reach it.